To use the various decals available you need to prepare a U van for your chosen design. As the RTR vans are a semi/flat gloss appearance they need either spraying with gloss or gloss paints applied to the sides for the decals to adhere.
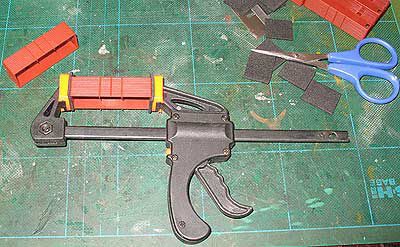
Basically you can’t get any simpler than the method I’m about to describe and it is within easy reach of a modeller with basic skills. The mask consists of using small neoprene rubber to cover the ends. The semi squishy rubber conforms to the ‘U’ van’s louvre shapes and protects it from the body side colour being sprayed.
They say a picture is worth a thousand words so rather than type another thousand words please look at the picture below as I think its self explanatory. Using a cheap clamp, a sponge is inserted between the hard clamp end and the van end. The clamp is then gently squeezed until the rubber forms a tight seal around the ends. Next spray the van sides the recommended colour that comes with the instruction sheet of the decals you have purchased. AMRM carried a comprehensive series on the advertising ‘U’ vans in the 1980’s.
Once you decal has been applied to the van side, coat the area with a decal softener like Mr Mark Softener, Microscale Micro Sol or Solvaset. This will cause the decal to hug down on the model. This may require anywhere up to 6 applications of softner. To aid conformity to you can use a pin to prick some difficult areas to aid adhesion. If wrinkling of the decal occurs after applying a Softener, DO NOT TOUCH the decal, as it will unwrinkle once the softener dries.

